Equipment and Preparation
The Vehicle
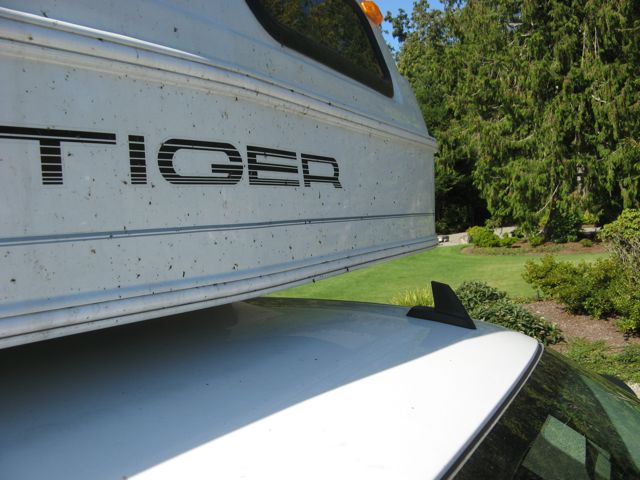
The vehicle we chose is pictured in the heading of this page. It is a Provan Tiger CX made by Provan Industries of Columbia SC. The chassis is a 2007.5 Chevrolet Silverado 3500 Extended cab LT pickup with the duramax/allison package. We purchased the vehicle in Nov 2007 expressly for the trip covered by this website. We have put about 10,000 miles, as of 30th March 2010 that should read 50,000, on the vehicle while we have owned it.
The choice of vehicle
In the end the choice of vehicle was pretty straight forward as there was really only one candidate that met all our requirements. However the process of deciding what our requirements were was anything buy straight forward and occupied a number of years. The criteria we ended up with were:
Small. We wanted something not much over 20 ft in length; with single rear wheels, and close to the width of a standard vehicle. The test turned out to be: could we drive it through a starbucks drive-thru.
Diesel. Everything we read suggested that diesel fueled would be more economical both in terms of fuel consumption and the price of fuel in South America.
Also; we have owned a number of diesel vehicles and I just liked the idea of a diesel engined vehicle.
As it has turned out; the advent of ULSD (Ultra low sulphur diesel) fuel in the US has added an extra question that I will discuss a bit more below.
Not a camper. We knew from the earliest days that we wanted a vehicle where we could move from the driving position to the living quarters without going outside.
That ruled out any type of pickup truck and camper combination.
Towing. One of our hobbies is jeeping off road with a modified 1997 Wrangler that we transport to the trail head on a car trailer. Hence the motor home had to be able to tow 7000+lbs possible for hundreds of miles.
4 wheel drive. Not that we wanted to do serious off roading (for that we could use the jeep).
But we knew from previous experience that we liked to explore off the main highways, down forest roads and other minor byways. Also we like winter travel. All in all 4x4 gives a greater margin for getting out of tight places.
The single rear wheel requirement ruled out any class A or class C style motor homes.
I liked (and still do) the van conversions based on the Mercedes Sprinter but they don't have the towing capacity we needed nor is (or at least was) 4x4 a proven options at the time we purchased our vehicle.
Van conversion based on chevy and ford vans augmented with a 4x4 conversion from Quigley (like the Sportsmobile) seemed like a good possibility. They can both be had in diesel; though the engines are de-tuned for lower power compared to their pickup truck siblings. In the end we ruled them out on the basis of poorer towing performance and less living space for the length of trip we planned.
Storage
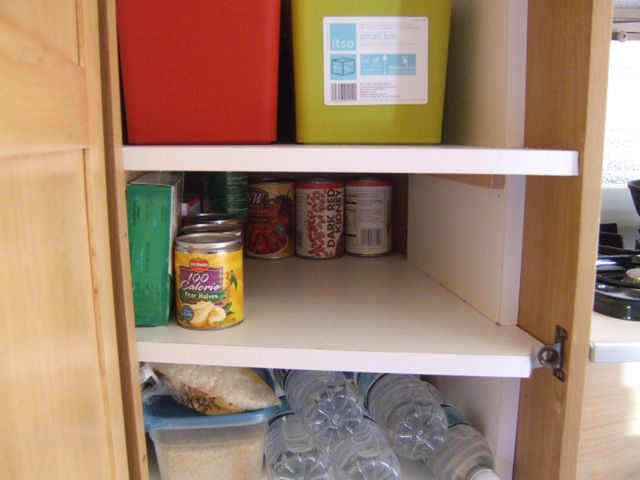
Food cupboard
After a couple of short road trial trips we decided that the cupboard which seemed to be designed for clothes on hangers was better used as the primary storage area for food.
To this end I fashioned a set of shelves using a very simply construction approach as can be seen in the accompanying photo.
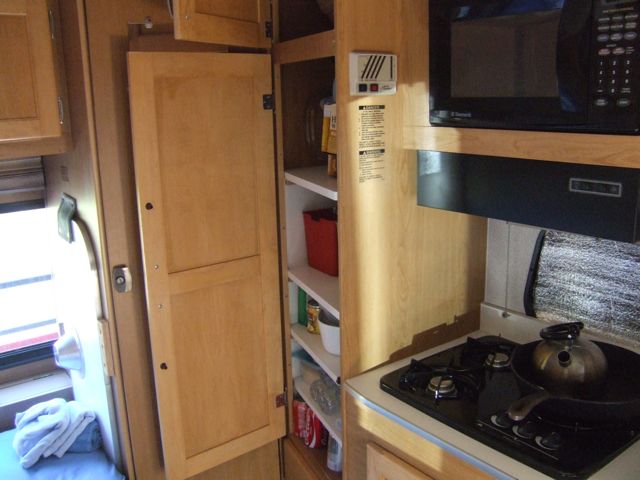
The table
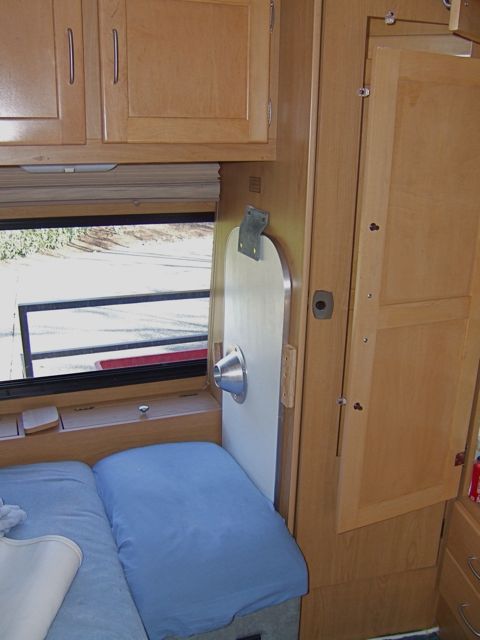
Taking over the hanging space for food left us without the standard place to store the long table that comes with the vehicle.
It so happens that the table will fit nicely between the lounge and bathroom wall. However we needed some way to locate it firmly so that it would not come meet us in the driving area under heavy braking.
The solution was simple and involved the cloth fastener that held it in place inside the cupboard plus a block of wood. See the accompanying photo.


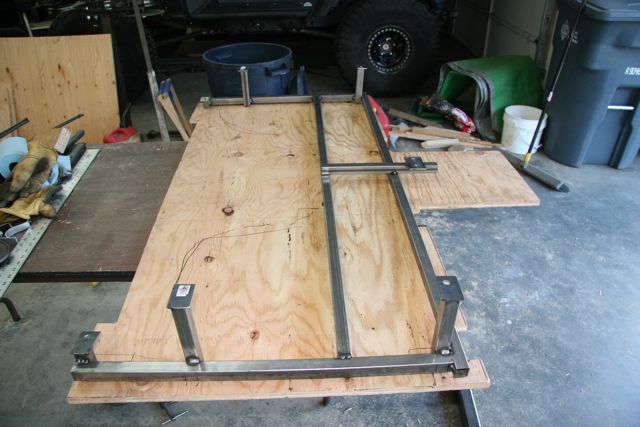
Behind the cab seats
We chose an extended cab version of the chevy truck because it gave a lot of potential storage space behind the drive and passenger. We thought we would need that storage for tools, spare parts, and consumables on the South American leg of the trip.
The question was how to make best use of that space.
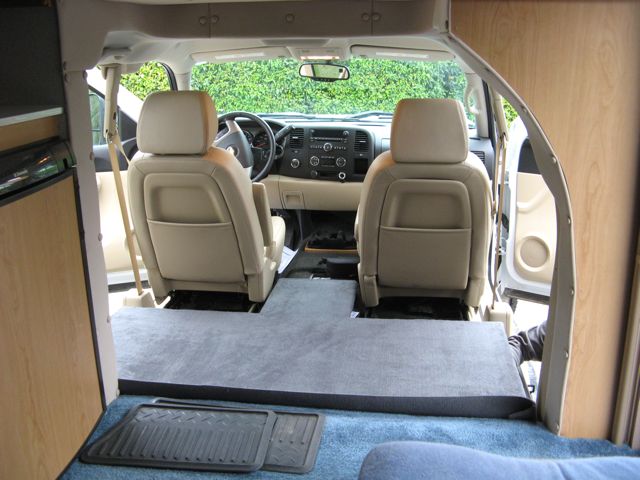
The first step was to make the area flat. We achieved this by fabricating a platform that is located in the back seat area. The platform is a frame of 1" steel tubing, topped with a plywood deck covered in carpet.
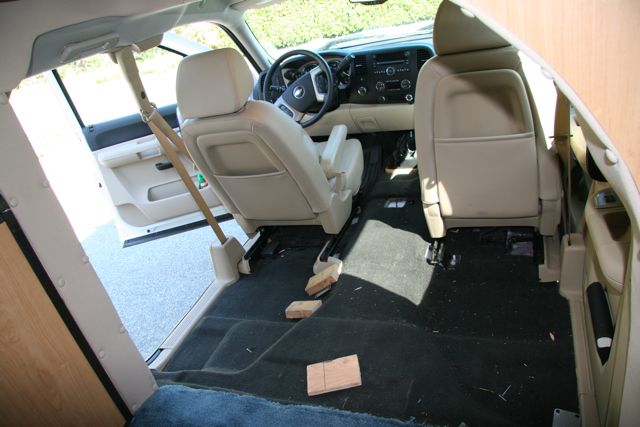
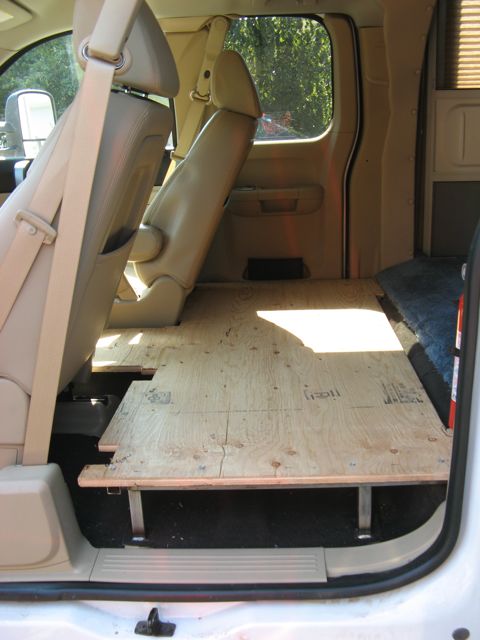
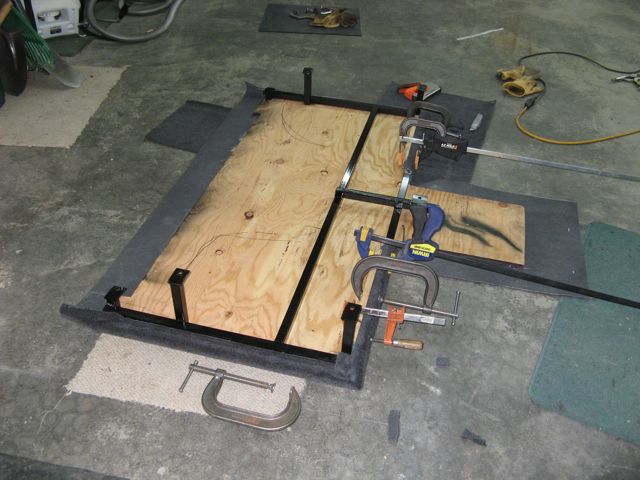
However the platform was only a partial solution. Simply piling stuff on the platform was not going to work very well.
After much discussion and trials of various types of storage containers we settled on the use of cardboard filing boxes. Four per side just happened to be about the right size. And they are cheap.
Update 10/04/2010.The cardboard storage containers did not last more than a few days. We quickly changed to plastic storage containers and have since added a small business suitcase - one of those roll-on bags business people use.
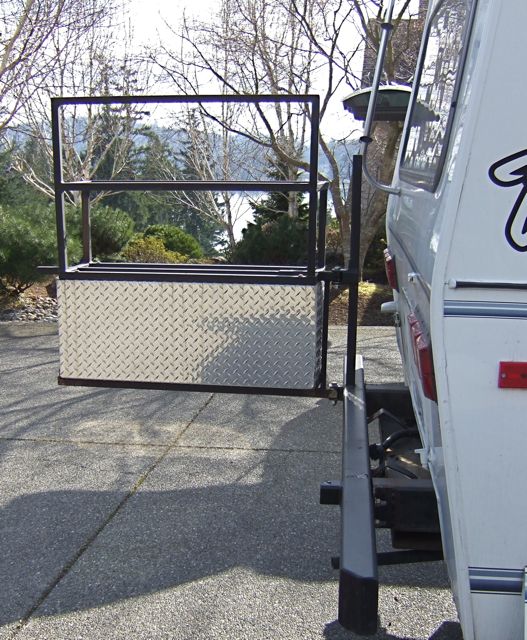
Rear storage box
Not withstanding the solution to the internal storage challenges I also wanted more external storage. Particularly for various vehicle fluids, oil, brake fluid, power steering fluid, coolant. If you have ever travelled with that type of stuff inside a vehicle you know why I wanted it outside.
The solution was an aluminum storage box at the rear of the vehicle (see photos).
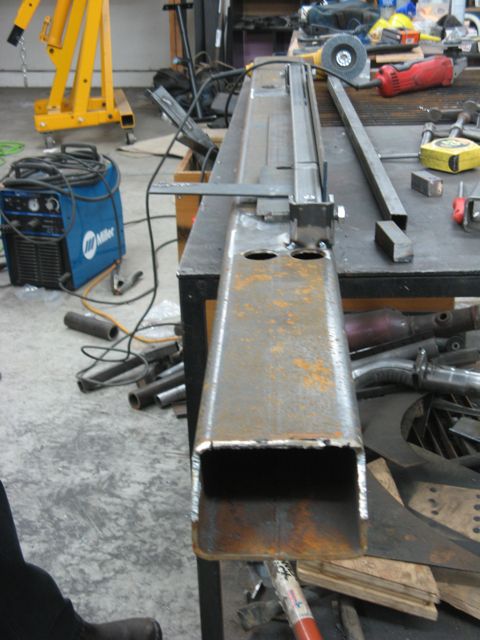
This was a fabrication exercise as it entailed replacing the vehicle rear bumper and making a swinging cradle for the box so that there was still access to the generator door.
While I was at it I added a storage rack on top of the box with the thought that at some point I might carry a second spare wheel and tire in that cradle.


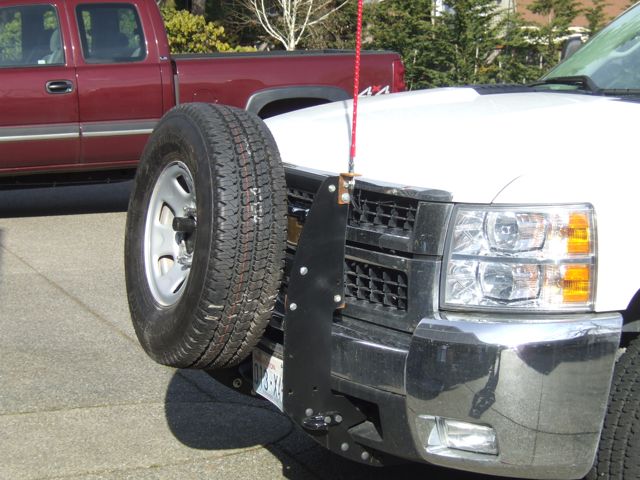
Tire at the front
However, with the new storage box on the rear I need a new storage place for the primary spare wheel.
And of course the obvious answer was hang it on the front.
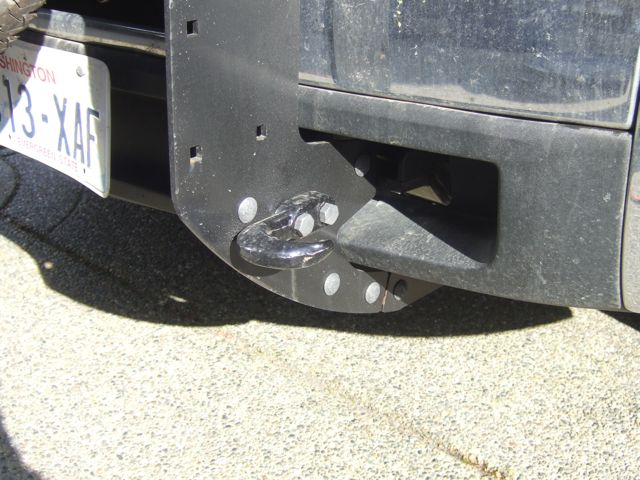
The base for the front mounting of the spare is a winch bumper arrangement called a Transformer sold by Warn (the winch people). To this I fabricated and added a mount for the spare wheel that bolts to the Transformer. Note the locking nuts on the studs on the spare tire. Sorry, they are a bit hard to see.

ULSD
As I noted above, there seems to be an issue with ULSD.
All US diesel vehicles after mid 2007 have a device called a Diesel Particulate Filter (DPF) which filters the engine exhaust to remove the black soot that (we have all seen) diesel engines discharge.
Every so often this filter clogs because of soot build up, and the engine compute burns the soot out of the filter by changing (adding more fuel) the engine operation.
All of this would not work (actually it would work but would require frequent replacement of the DPF - so maybe the correct statement is - would not be practical) without a change over to fuel that produces less soot in the first place
Thats where ULSD comes in.
The problem is that (apparently) ULSD is hard if not impossible to get in central and South America.
The consequence seems to be the possibility that the DPF will clog badly and the the engine computer will prevent the engine from operating except in so called limp mode.
I have read in many places that the solution is to remove the DPF and change the computer programming. However, this does not seem all that easy and is illegal within the US.
I will update this page as I learn more.
Winterizing
We anticipate cold conditions as we travel through British Columbia, the Yukon and Alaska during March and April, with temperatures perhaps well below zero Fahrenheit.
We have previously travelled in the Tiger with temperatures as low as zero Fahrenheit (see www.oziblackwells.com) and based on this experience we felt that some modest cold weather preparation was needed.
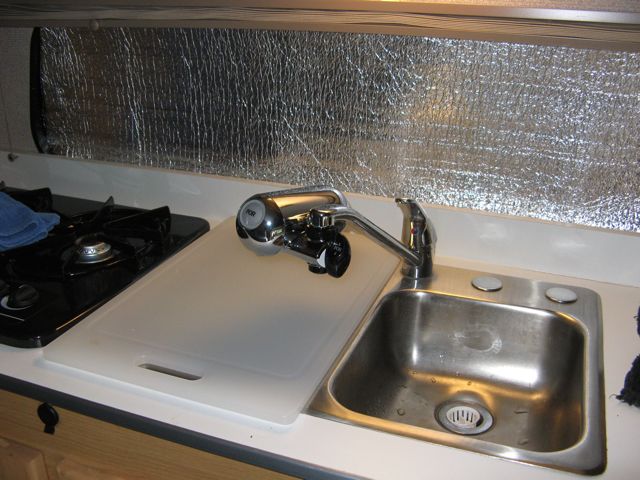
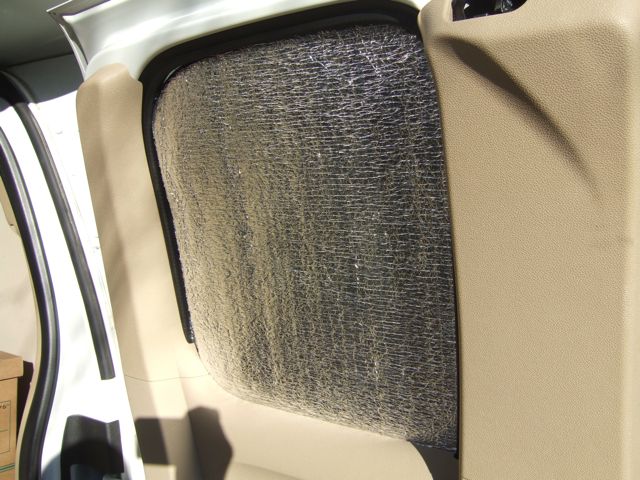
We fitted silver bubble wrap insulation to all of the house windows, and vehicle windows, and purchased a windshield cover for night time.
We will carry a small electric heater to supplement the house furnace.
We had holding tank heaters installed as an option when we bought the vehicle but they are only useful when the engine is running, or there is shore power (or generator running). We will add anti-freeze to the holding tanks (and S-traps) to protect them when during periods when the heaters are not running.
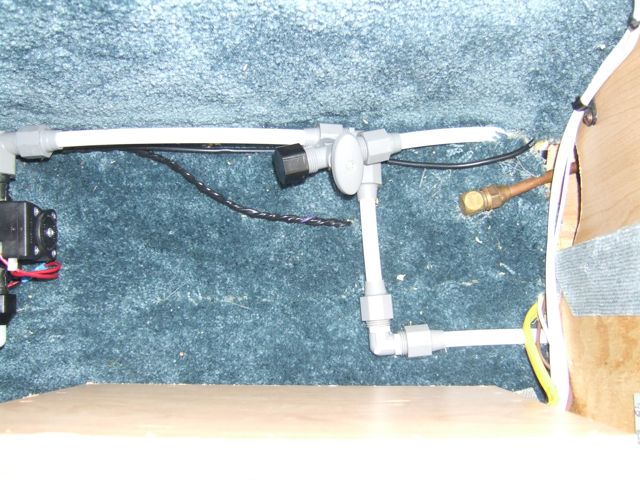
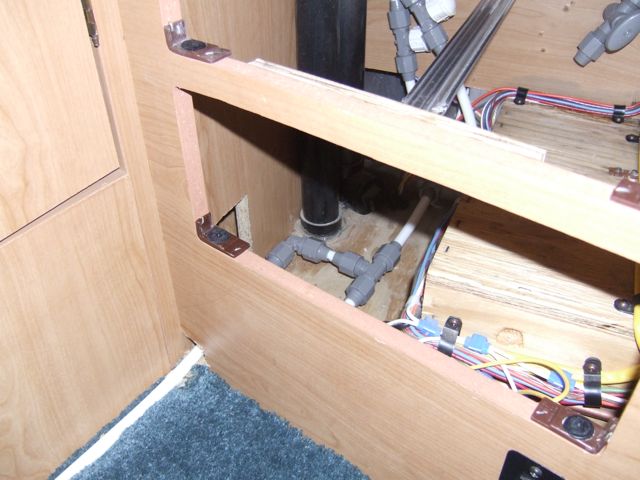
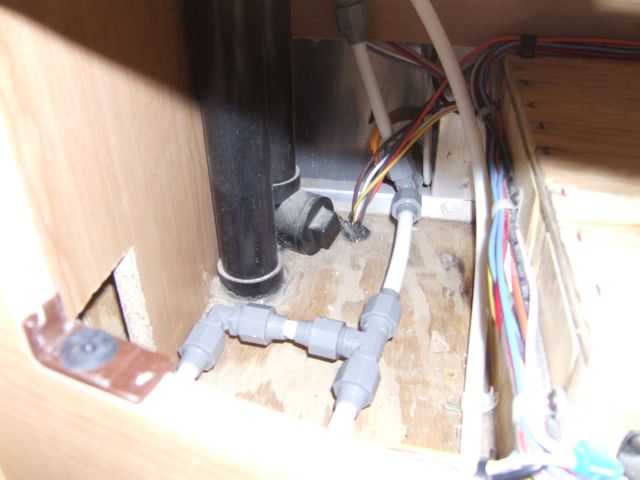
I have re-routed the main fresh water line so that it no longer runs under the shower stall. We have had the experience of this freezing on previous trips.
All in all the design of the house could be improved in a number of ways to enhance its cold weather capability. As it stands it really is a 3 season motor home not a 4 season. I will add a list of suggestions at some other time.
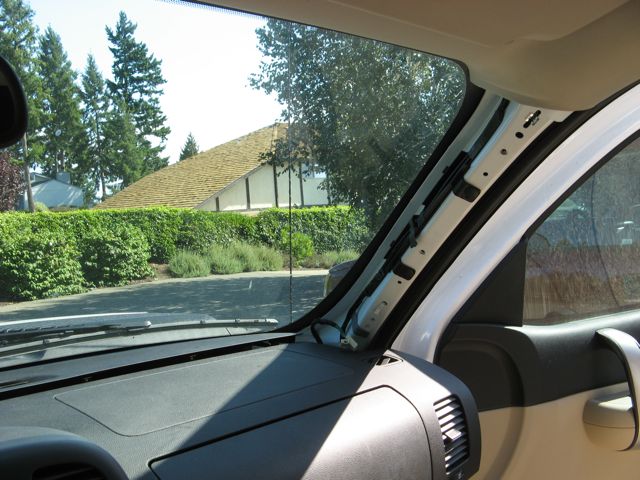
XM Radio Antenna
During the manufacturing process I had the factory install a Sirius Satellite Radio Antenna on the roof of the house with coaxial cable from the antenna run to the dash area, the overhead sleeping area and the rear lounge beside the toilet. At the time the reason for this was that I wanted to be able to connect my Sirius Stilleto receiver at different places in the vehicle so that I could listen to it whilst in camp.
As it turned out I never did use the antenna for that purpose but instead decided to use it as the primary antenna for the XM Radio that came with the truck. My hope was this better positioned antenna would provide better reception. Note that the OEM antenna is blocked by the roof of the house whenever the satellite is positioned behind the vehicle. This in my mind accounts for the noticeably poor reception when we are in the Pacific NW traveling in a West of NW direction.
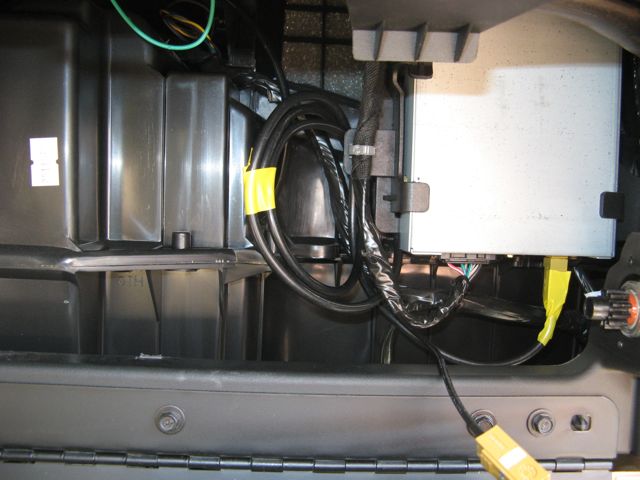
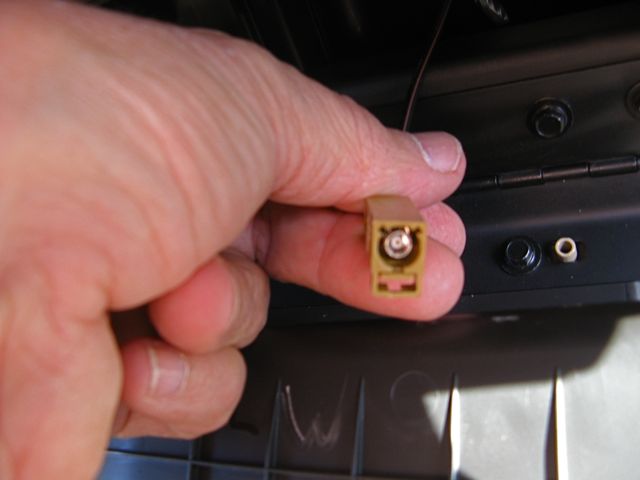
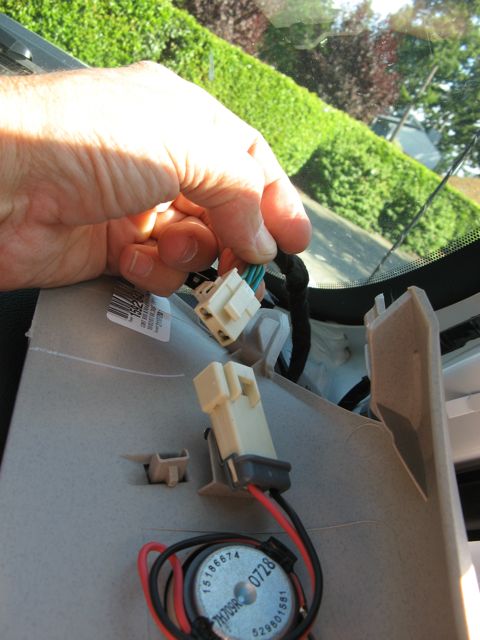
As can be seen in the photos the XM receiver is behind the glove compartment. I removed the pillar cover and top dash cover in order to run the cable. Also note the type of connector used to mate the coaxial cable to the receiver. Its called a FAKRA or FAKRA II connector and can be found at digikey.com.


Tools
I plan on carrying a good range of hand tools for minor mechanical and electrical repairs and maintenance. These will be carried in canvas bags and stored under the platform behind the driver/passenger seats. The list of these tools is not very exciting; spanners, sockets, pliers, hammers, files, sheet metal cutters, soldering iron, spare wire etc.
Spares and consumables
The list of spares is still a work in progress. However, at a minimum I will carry replacements for all belts and hoses, spare fuses, light bulbs, spare brake pads, tire repair kit, spare tire valves.
The consumables list is a bit easier; some of every type of fluid the vehicle uses (engine oil, ATF, gear oil, coolant, brake fluid, steering fluid) plus RV anti freeze for the holding tanks.
Computers
Taking a computer on this trip was never really in question; indeed we never really debated that we would in fact take two laptops, one each.
- We need some where to keep photos. Although there are other options (such as a Sony photo storage device) a computer is the best option given that we have a vehicle to carry such equipment.
- While on the road we will need to continue to manage our family financial and other business matters and, carry record related to that. A computer makes that a lot easier
- Communication via email. While we will often have to use libraries or internet cafes having ones own computer will make communication easier. Also in recent years we have become frequent users of Skype for talking to family members who are scattered around the world.
- This web site, it would be much more difficult to maintain a web site while on the road if we had to rely on finding computers in libraries and internet cafes that had the facilities to update a website.
- Entertainment. With a laptop we can in principle download movies and watch them on the computer and we can also update iTunes and hence our iPods.
- Navigation. As you will see in the GPS section we are using a GPS program that runs on a Windows computer.
As it has transpired my wife has a new Windows Vista HP Laptop and I have a MacBook Pro.
The windows machine will be used for GPS (Delorme), business records (excel, Quicken, TurboTax), photo storage (with photoshop), (my wife's) email and iTunes.
The Mac will be used for email, web site maintenance, DVD viewing, my iTunes library, and my photos particularly those that are used in the web site.
Backup
Unfortunately computers sometimes break, and having committed to storing some (to us) important stuff on our laptops we had to give some thought to protecting that stuff; that is backup.
The primary backup is to have an external backup disk for each laptop and to do a regular full image backup of each machine onto that external drive.
The Vista machine came with an eSata port; to this I have attached a OyenDigital USB/eSata 500GB portable drive (formatted NFS). The full image backup is performed by Acronis software.
For the MacBook I have purchased an eSata Express34 card and another OyenDigital 500GB portable drive. The drive has been formatted as an OS X disk and the full image backup is performed by SuperDupper.
As a secondary backup vehicle for photographs and other special documents I have a WDC USB 300 GB portable drive formatted as a FAT32 drive so it can be used by both systems.
Power
The vista machine is using an iGo that will work from all international mains power as well as auto lighter sockets and planes.
On the MacBook I am using the OEM mains power supply, and a separate combined auto/air power cord.
In addition we are carrying a couple of 75W inverters and a single 300w inverter.
About this website
I thought it might be useful to record some of what I have learned in putting this website together; and maybe offer a little apology for what some might see as a "lack of taste" or "excess" in some of the graphical and/or esthetic choices I have made.
I started playing around with html and websites about a year ago. I come to that task with a long out dated background in programming (circa 1980), plus some more recent experience in Visual C++. None the less I was/am a novice at this web stuff.
The idea of a trip website had two attractions, firstly it is a good way to record the trip, and also was an interesting technical and learning exercise in and of itself.
Lesson One - Don't Use "Site Builders"
My first experience building a website with some real content was a Yahoo hosted site for a trip we did last year. For that site I user Yahoo's site builder system. I was unhappy with the plainness of the templates available and the inability to "get at" the underlying html. That just felt like an unnecessary limitation (I am a bit of a nerd after all).
Following that experience I did some investigation, of iWeb, Godaddy's site builder and other systems that "make building a site easy". All in all I reached the same conclusion about those. They did not meet my needs. They might have built an adequate site but I would not be able to see how it all worked under the covers.
Hence about 6 months ago I started looking for a more hands on "tool set" for building web sites and pages.
A college assignment using php
As luck would have it at about the same time I was asked to help a media student with a web assignment that involved storing and updating some data on the server. This led me to find out about php, mysql and javascript. Not to claim that I am an expert or even competent in them but I am on the learning curve and can make them do stuff I want.
The "basic" tool set
I used a very basic tool set for the assignment. FileZilla to FTP files to the hosting server,Programmers Note Pad to edit/create files, Firefox to view the results. Its worth noting that I found two firefox add-ons, HTML validator and Firebug javascript debugger, to be very helpful. Particularly the Firebug debugger; I dont know how you would get javascript working without that.
On my MacBook I can use FileZilla and Firefox, but not Programmers Note Pad (its a Windows only program); instead I use TextWrangler as an editor.
Coda (from Panic), the next step up in convenience
On the Mac there is a program called 'Coda' that (from www.panic.com) puts file transfer, editing, browser preview and some other stuff together in a single package. This is a very convenient package; in particular it remembers what files has been changed and does selective file transfers to your hosting site.
A Wysiwig HTML editor
A recent effort to to write up a journal for a trip to Vancouver Island highlighted the need for an HTML editor that would perform spell and grammar check (which Coda will actually do also), allowed basic wysiwig text entry, and visual selection of images to include with the text. I found it just too difficult and time consuming to write directly into html code and have to remember image file names to put in <img> tags.
I have tried a number of such editors, and have settled on Nvu and Amaya. Both seem to be available free and Nvu is available on Mac, Windows and Linux.
I also tried Dreamweaver; it handled the task wonderfully. But is way too expensive for my taste. If I was doing web sites professionally I would consider it.
Templates and Dreamweaver
It did not take long to realize that using a standard page layout led to a lot of repetition and the hence the need some form of page template.
As you can see; the top level pages on this site share a common layout, which means common html code (with maybe a little parameterization). This turned out to be a right pain as any change to the layout required a change to five or six individual pages. So I went searching for a way to build templates so that I would only have to change things once.
Initially I thought Dreamweaver was goint to be my solution. Its a very complete package, does all the Coda does, plus has a template feature. It generates the html for each instance of a page from a special kind of page called a template, even allows parameters to be passed to the template.
Along the way I realized that I could use the php scripting language to achieve the same almost result.
By placing common html elements in .php files or .html files; I could have those common elements pulled into my web pages using the require() or #include directives. This also opened up the full power of php functions as my include files could have functions that I simply call in the target file to generate any desired html. The only down side of this approach is that wysiwig html editors do not display the pages with full formating as they cannot expand the requires, includes and php functions.
Dreamweavers approach to templates does not require php to be expanded and hence provides full wysiwig editing of web pages made from templates. But as noted above I dont see that feature as being worth the $400 that dreamweaver would costme.
Photo galleries
I have started work on some php code that will provide simple photo galleries with very little effort beyond that required to edit the candidate photos and put them in an iPhoto album.
The basic idea is that each gallery will be a directory that contains a Thumbnails and Images sub directories.
From this information alone the php code will generate a page containing a table of all the image thumbnails and will provide links to (php generated) pages that hold each individual image in its large form plus next/prev/up navigation.
This scheme is build around the web feature of iPhoto. This features exports images in both thumbnail and large size in the directory arrange described above.
You can see an example of this by going to the Home->photos
The Trip Journal
Like galleries I need a simple way of making daily journal entries.
Heres what I have come up with:
- Each journal entry will reside in a directory of the form /journals/entries/YYMMDD
- Each entries directory will contain:
- a file named original.html which contains the source html text for the entry. This will be written by starting with a template file and using NVU to add the relevant text for that entry plus and images for that entry.
- a sub directory named Images which will hold the large format version of any images used in this journal entry.
- a sub directory named Thumbnails which will hold the small format version of any images used in this journal entry.
- a file named index.php which is built by a php script from the information previously described. This is the final form of the journal entry formatted to look like a whiteacorn.com page.
Whats left to do ? - ironically journals don't handle images the way I want just yet. Once the gallery code is done I will go back and finalize the journal code.
A Google map of where we have been
I have been impressed by other peoples travel sites that have a Google map with each day-end position marked by a little pointer; I just had to have one.
The site now has one, go here .
I was surprised at how easy this was. The page itself required maybe 20 lines of javascript code. There are plenty of tutorials on the web that will show one how to do that.
The hardest part is getting the latitude and longitude data fed to the page so that the markers could be placed on the map
Since I had already planned to have position information in each journal entry I simply had to resort to php once again and write a script that scanned across all journal entries and extracted, date, place name, and GPS data. The php simply packaged that data and sent it to the javascript in the map page when requested.
Now the map will be updated with new markers whenever I add a new journal entry.
Photographic Equipment
We are enthusiastic photographers and on previous trips have taken many photographs, as many as 150 per day.
Nina tends to photograph local culture particularly the people while I focus a little more on scenery and the actions or narratives related to our trip. Neither of us are what you would call artistic photographers and tend towards a documentary style.
Nina is not at all a geek when it comes to photographic equipment; whereas I have a tendency in that direction. But none the less a tendency that is reined in by the cost and speed on change in modern digital cameras and related equipment as well as the practicalities of traveling; notably that a large bag of expensive looking camera gear is often an inconvenience that will many times prevent you getting good photos in say a local outdoor market.
Our camera gear reflects this thinking.
We both have small sized but capable digital cameras.
- Nina has Canon Powershot 710 (6 x optical zoom, 7.1 mega pixels)
- I have a Fujifilm FinePix E900 (9 mega pixels, 4 x zoom).
These have been our primary cameras on recent trips. They are small enough to go in a pocket or hand bag. Allow us to be unobtrusive when taking photographs of local customs or street scenes.
Importantly they both have good battery endurance and both use AA batteries. Generally we run them on 2500 mah rechargeable AA batteries but we can use off the shelf AA batteries at a pinch.
In addition I have a Canon D20 digital SLR with a 17-85mm zoom and a 75-300 mm zoom. This camera pre-dates the two smaller cameras. I tend to use this when time, weight, and conspicuousness are not issues.
Communications
Vehicle to Vehicle
On the North American part of the trip we will be traveling by ourselves and hence there will not be much call for convoy style communication. However, in Central and South America we will be in a group or convoy and hence some for of vehicle to vehicle communication seems necessary. To meet this need I have chosen to install two forms of radio communication.
- The first is a Cobra 75WXST Citizen Band transceiver. This is a very small device that mounts up under the instrument panel with all the controls in the microphone. An antenna is mounted on the front bumper.
- The second is a ham 2 meter transceiver. This is much more powerful than the CB radio in its own right and also has the capacity to hook into the ham repeater network. The downside is that to operate one of these you need to get a radio amateur license. This license comes in three levels, the first or lowest level is called the technician class which requires that an examination be passed. Its not too demanding but does require some study. This device is neither purchased nor installed yet but will mount below the instrument panel. It will also require an antenna mounted on the bumper.
In addition I will carry a hand held CB to allow communicate between driver and guide whenever I am receiving directions from outside the vehicle.
Cell and Other Phones
It goes without saying that we will both carry cell phones and they will provide reliable and relatively cost effective communication to our friends and family while in populated areas of the USA. Outside of populated areas reception issues and roaming charges will make cell phones less effective.
I expect that my t-mobile cell phones will provide good phone reception in many Central and South American countries just as it does in asia and europe. But it is expensive. Hence in those regions cells phones will be an emergency only option.
MCI or some other form of calling card is a more cost effective means of communication when but relies on finding a working land line phone and knowing the access number for the country region.
We will also investigate buying a pay-as-you-go cell phone locally in South America and maybe changing GSM chips as we move from country to country
Skype and Email
I put these together even though they are very different forms of communication as they both require internet access.
As discussed under the heading of computers we plan on using our laptops (or internet cafes) for regular email communication with family. When we get internet reception for our laptops we will also use Skype for phone communication.
GPS and Navigation
We have been using a DeLorme gps system on a laptop with both the Street Atlas and Topo USA mapping packages for a number of years (we have been using the 2004 set until recently) and have generally been very happy with both the map accuracy and route finding capability of the system, even when using the Topo maps on forest roads.
There are however two key limitations of the system that caused us to consider alternatives.
- Based on a laptop. This prevents us using the system when walking around. It certainly would be (on occasion) convenient to have a hand held in cities. The laptop also gets hot on ones lap is it is used for any length of time.
- Limitation in range of maps. As far as I can tell Delorme only provides street maps for US, Canada, Mexico and Topo maps only for the US. This struck us as a major limitation for a journey thats is planned to spend a good deal of time in South America.
Despite these limitations we plan on sticking with the Delorme system and using paper maps for those parts of the journey where we done have digital maps. The reason for this decision is simplicity and cost. For $200 we can get the latest Street and Topo maps plus a Bluetooth GPS receiver that will cover the US, Canadian and Mexican legs of the trip. After spending a considerable time on the internet looking at alternatives I could not easily determine whether Garmin or Magellan were going to offer better map coverage (I assumed they would but could never convince myself of it). And their solutions seemed a lot more expensive as it looked like one would have to buy lots of different mapping packages.
Finally the idea of trying to piece together digital mapping coverage of central and south america from different sources was simply too daunting.
Update 13th August, 2009
I have been meaning to update this page for a long time as we dispensed with the Delorme GPS system within the first 2 weeks of the trip. The HP lap top we were using has one of those glossy surfaced screens and is all but unreadable in the cab of the vehicle. Also as we approached Canada the absence of real Canadian maps was an issue. We bought a Garmin Nuvi using US/Canada base maps and have been very happy with it throughout our travels in the US and Canada. We purchased the Garmin Mexico map which worked just fine for the Mexican leg of the journey. We got through the rest of Central America with the Garmin world base map as we were traveling with someone who knew where they were going. Now in Columbia and with no knowledgeable traveling companion we need all the help we can get in the navigation department. We found a free Garmin compatible and self installing map of Columbia at http://mapcenter2.cgpsmapper.com/ . Though we had to find out about, and download, MapSource to use it. From the same source I have obtained, but not tested, routable maps of Peru, and Argetina.